ARDUINO TUTORIAL FOR BEGINNERS LESSON 4: “HELLO WORLD” WITH 16X2 LCD WITH I2C MODULE AND ARDUINO UNO
In this lesson, we are going to display “hello world” that scrolls from right to left with an interval of 500 milliseconds with the use of Arduino Uno Board and 16×02 LCD (Liquid Crystal Display) with I2C module. This Arduino tutorial for beginners will let you learn the basic display of hello world.

ARDUINO TUTORIAL FOR BEGINNERS LESSON 4: "HELLO WORLD" WITH 16X2 LCD WITH I2C MODULE AND ARDUINO UNO
#ArduinoUno #16x2LCD #HelloWorld
In this lesson, we are going to display “hello world” that scrolls from right to left with an interval of 500 milliseconds with the use of Arduino Uno Board and 16×02 LCD (Liquid Crystal Display) with I2C module. This Arduino tutorial for beginners will let you learn the basic display of hello world.
Reference: https://www.makerlab-electronics.com/
Introduction
This LCD is equipped with an I2C Backpack which reduces the signal pin to just 2. I2C bus is a type of serial bus invented by PHLIPS. It is a high-performance serial bus which has bus ruling and high or low speed device synchronization function required by multiple-host system.
The blue potentiometer on the I2C LCD1602 (see the figure below) is used to adjust the backlight for better display. I2C uses only two bidirectional open-drain lines, Serial Data Line (SDA) and Serial Clock Line (SCL), pulled up with resistors. Typical voltages used are +5 V or +3.3 V although systems with other voltages are permitted.

Components
- 1 * Arduino Uno board
- 1 * I2C LCD1602 module
- 1 * USB cable
- Several jump wires
Experimental Principle
In this experiment, we will let I2C LCD1602 display “Arduino” and “hello, world” by programming.
Experimental Procedures
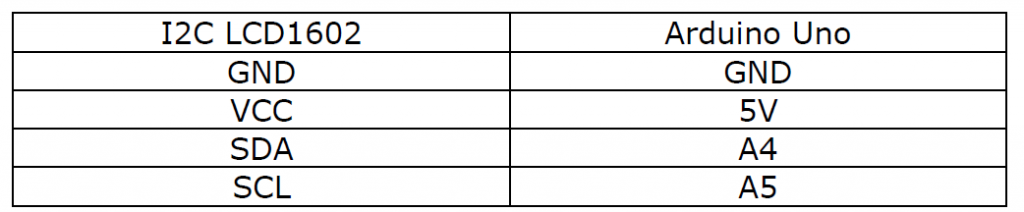
Step 1: Build the circuit
The connection between the I2C LCD1602 and the Arduino Uno board:

Step 2: Program (Please refer to the example code)
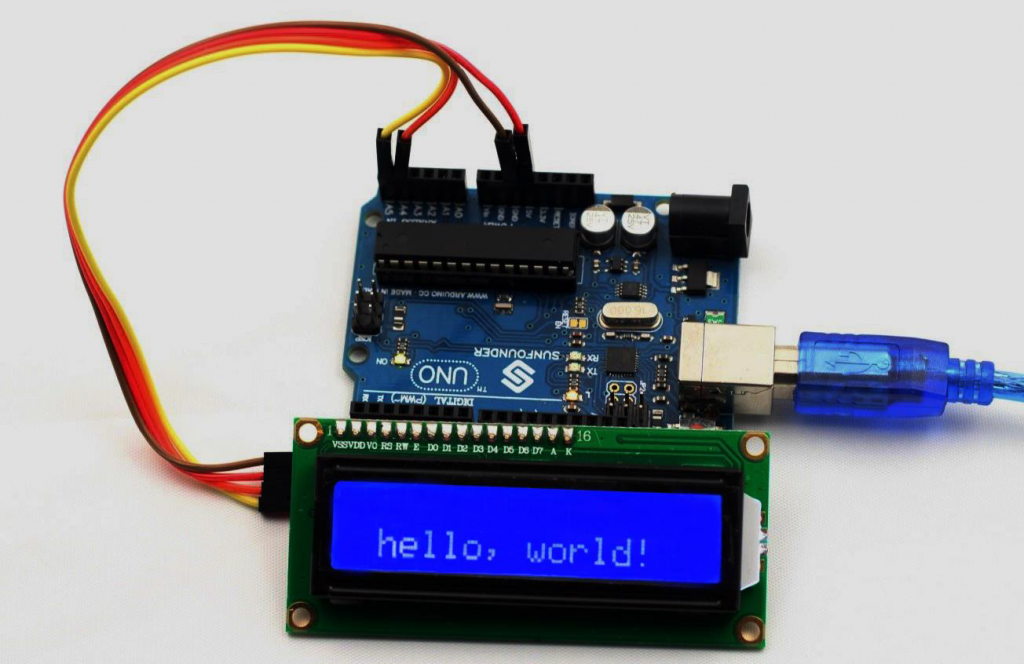
Step 3: Upload the sketch to the Arduino Uno board
You should now see your I2C LCD1602 display the flowing characters: “hello, world”.
Note: If for some reason your LCD doesn’t display anything, you might need to adjust the brightness of LCD, or you might need to change the I2C address on the Arduino code, from 0x27 to 0x3f.
Please take note of the address as you will need to modify this in other lessons.


I have recommended stores where you can buy the components:
https://www.makerlab-electronics.com/
https://www.e-gizmo.net/oc/index.php
Related searches: 16×2 lcd arduino 16×2 lcd display 16×2 lcd with i2c module 16×2 lcd i2c 16×2 lcd display arduino 16×2 lcd projects arduino lcd arduino lcd display arduino lcd i2c arduino lcd projects arduino lcd i2c scrolling text arduino lcd i2c projects arduino lcd i2c tutorial
Join this channel to get access to perks: https://www.youtube.com/channel/UCEoNaDH6R_Iu8ee58-hsGxQ/join
Follow our social media accounts:
Facebook: https://www.facebook.com/kringgidz
Facebook: https://www.facebook.com/gideongasulasbuniel
Website: https://e-boombots.com/
Instagram: https://www.instagram.com/gideongbuniel/
Twitter: https://twitter.com/KringxG
Tumbler: https://www.tumblr.com/blog/kringxgidz
Pinterest: https://www.pinterest.ph/KringxGidz
Linkedin: https://www.linkedin.com/in/gideon-buniel-118bb35a/
Full Video:
Arduino Code:
// include the library code
#include <Wire.h>
#include <LiquidCrystal_I2C.h>
/**********************************************************/
char array1[]="                          ";  //the string to print on the LCD
char array2[]="hello, world!             ";  //the string to print on the LCD
int tim = 500;  //the value of delay time
// initialize the library with the numbers of the interface pins
LiquidCrystal_I2C lcd(0x27,16,2);  // set the LCD address to 0x27 for a 16 chars and 2 line display
/*********************************************************/
void setup()
{
  lcd.init();  //initialize the lcd
  lcd.backlight();  //open the backlight
}
/*********************************************************/
void loop()
{
  lcd.setCursor(15,0);  // set the cursor to column 15, line 0
  for (int positionCounter1 = 0; positionCounter1 < 26; positionCounter1++)
  {
    lcd.scrollDisplayLeft();  //Scrolls the contents of the display one space to the left.
    lcd.print(array1[positionCounter1]);  // Print a message to the LCD.
    delay(tim);  //wait for 250 microseconds
  }
  lcd.clear();  //Clears the LCD screen and positions the cursor in the upper-left corner.
  lcd.setCursor(15,1);  // set the cursor to column 15, line 1
  for (int positionCounter = 0; positionCounter < 26; positionCounter++)
  {
    lcd.scrollDisplayLeft();  //Scrolls the contents of the display one space to the left.
    lcd.print(array2[positionCounter]);  // Print a message to the LCD.
    delay(tim);  //wait for 250 microseconds
  }
  lcd.clear();  //Clears the LCD screen and positions the cursor in the upper-left corner.
}
/************************************************************/